"Howdy Folks! Welcome to the little mining town of Rainbow Ridge, the gateway to Nature's Wonderland"

This is my documentation of my miniature re-creation of the long-gone Disneyland attraction: Mine Train Thru Nature's Wonderland. This is a selectively compressed model railroad, in On30 scale at 5' X 7.5' that has been in progress since September 2005. In May of 2016, I finally got the layout to a point where I declared it "finished".

I started the layout when I was a sophomore in high school with basic skills and over the years the layout has been improved and reworked in drastic ways to match my ever improving model making skills. In fact, since I started rebuilding the sections to better quality and standards, I've actually created a whole new layout, piece by piece.

This is a stand-by basis project without a deadline, so it tends to hit the back-burner a lot due to other things with higher priorities. But whenever I can, I'll give an update when there is something worth talking about. All of my updates since day one are here, which include photos, videos, and plenty of rambling notes and descriptions.


November 2012 Update

With the end of the year rapidly approaching, the extensive Cascade Peak rehab and waterfall replacement project is finishing up with the last set of waterfalls, Big Thunder Falls, finally installed. There was no update for October since layout progress halted during a research and development special effects project that was on the main burner. Since Halloween has come and gone, that project has lost inspiration and momentum which means gears are shifting into coming back to Nature's Wonderland.


Big Thunder Falls took the longest to do out of all the waterfall sets, despite gaining experience and practice with the other two sets. This was mainly due to the fact that not only are there more waterfalls, they're also bigger-- and there was a time lapse camera. 

To somewhat "redeem" myself from the tutorial featuring waterfalls that will eventually fade and turn yellow, I made a new tutorial video showing how to make miniature waterfalls the new way I developed. Of course, this slowed down production time, but it's a technique many other modellers will appreciate. 

While the new technique is much more realistic, it's also much more tedious (as you'll see on the sped up clock in the video). This is the big waterfall the train passes under, clocking just over an hour to shape/form/melt. 


It was well worth the time though! The usual followed, with enviro-tex lite resin pools.


Finally, here it is all put together.


And the waterfall tutorial itself:


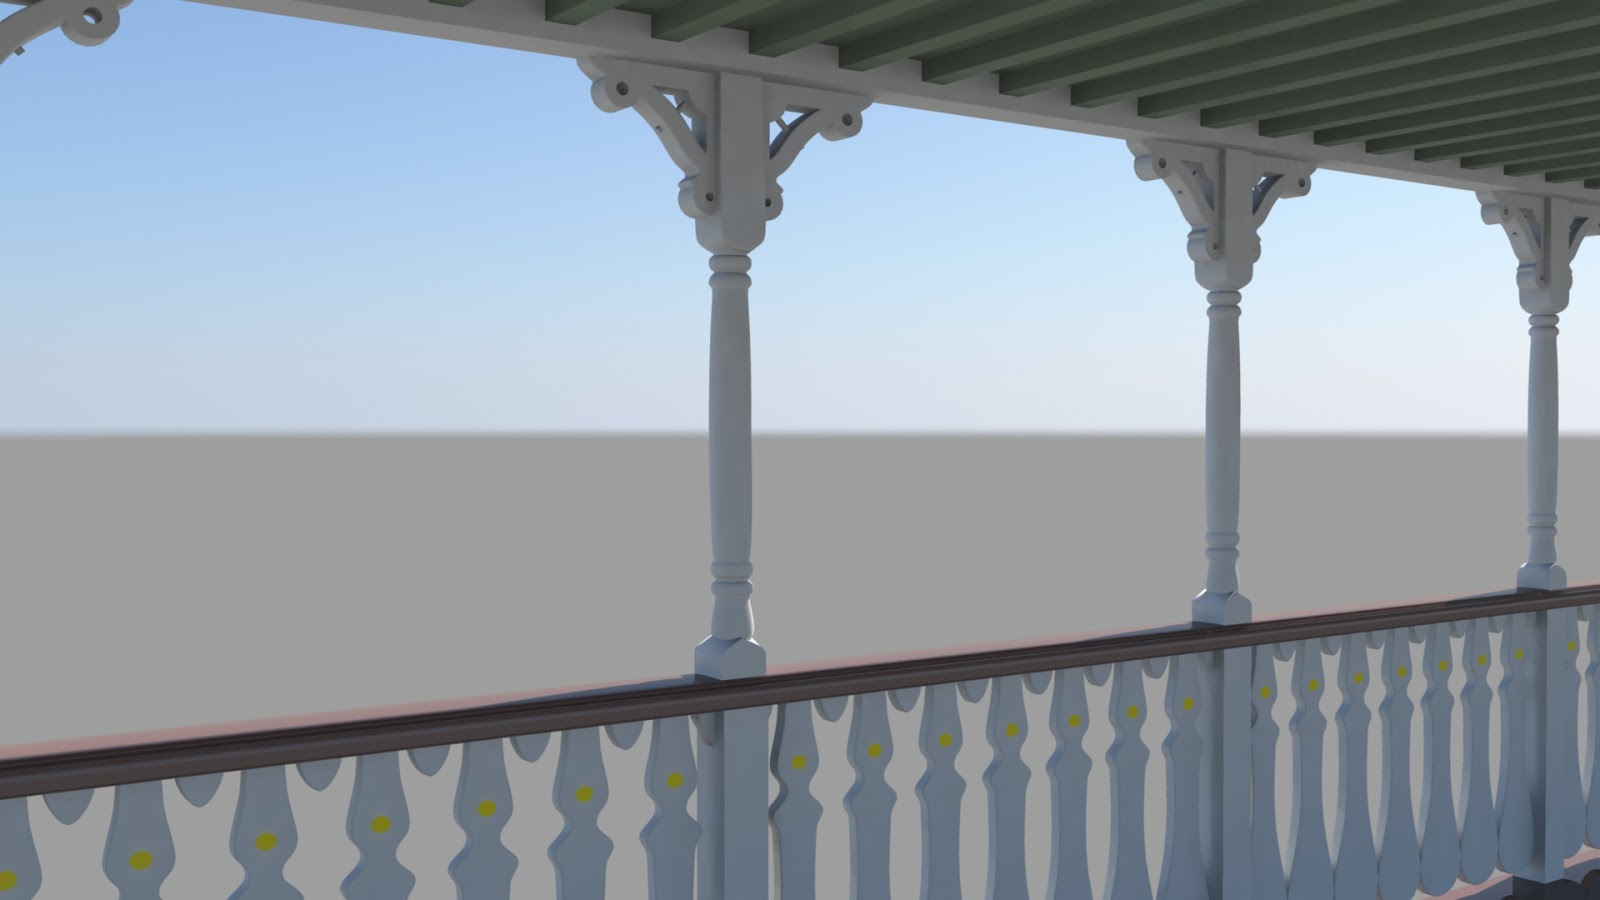
One thing to note is the special clip at the very end of the video, with the POV of the Mark Twain. This was something that was just a simple idea that grew into this crazy composite project. For some time I had been thinking about doing a POV from the Disneyland Railroad passing by the Living Desert, shooting the background from a miniature foreground. Since that won't be for awhile, I decided to try it out on the Rivers of America. Since my skills in computer modeling and rendering have greatly improved over time, I thought I'd give it a shot on this, well, shot. I decided to model the foreground in Maya rather than do it physically, since I can control the lighting, movement, and angle much more precisely. 


When I shot the background plate, basically my DSLR on a PVC pipe as a steady rest, I matched the movement and tried to mimic the (unintended) camera shake as close as I could in the Maya model camera. Then it was a matter of modeling the Mark Twain railing and columns. 


When everything looked right in test frames, the whole foreground was rendered and composited over the background (hence the blue screen above). 

The result was a very successful and fun shot to work on! After doing this, the original Railroad POV mentioned above will be done like this when I get around to it. 


Now that the waterfalls are finished, so is the lighting package for Cascade Peak! 


September 2012 Update

As of today, the layout has been in production for 7 years. While at the snail pace that it progresses, it's still slowly becoming the finished and professional layout that it was intended to be.

If you haven't checked it out already, the layout has been getting updates posted over at FaceBook at
Facebook.com/nwrrmodel

While the layout is rotated into the orientation that allows easy access to the waterfall side of Cascade Peak, I took advantage of that. Continuing the new look of the waterfalls I redid during the summer (scroll down to the June/July update) I worked on the middle set of falls to reflect the updated style.

First order of business was to rip out the silicone falls and get the base part of the falls ready for the new ones. Since the silicone is extremely flexible, it was easy enough to peel off the pools and falls from the layout with minimal repairs. However, with the addition of the new LED lighting, those minimal repairs were just a starting point.


I punched a couple holes through the scenery to run wiring for the LED's. Unfortunately, in the process I knocked the speaker that broadcasts the sounds of falling water out of position and it need to be re-attached (hence the bigger hole in the middle).

Once the wiring was finalized and the LED's soldered on, patchwork commenced with celluclay and paint touch-ups were applied. Good as new!


The falls themselves were fabricated from 0.040" plastic sheets and a soldering iron was dragged across in vertical streaks to create the shimmering look. I'll go into much more detail when Big Thunder falls get their rehab in the next update. 

As with the last set of waterfalls, the pools were poured with Enviro-tex resin and later coated with a layer of Mod Podge to hide the glass-like finish. 


A plastic sheet protects the resin from unwanted dust while it sets. 

And finally, the new waterfalls! 


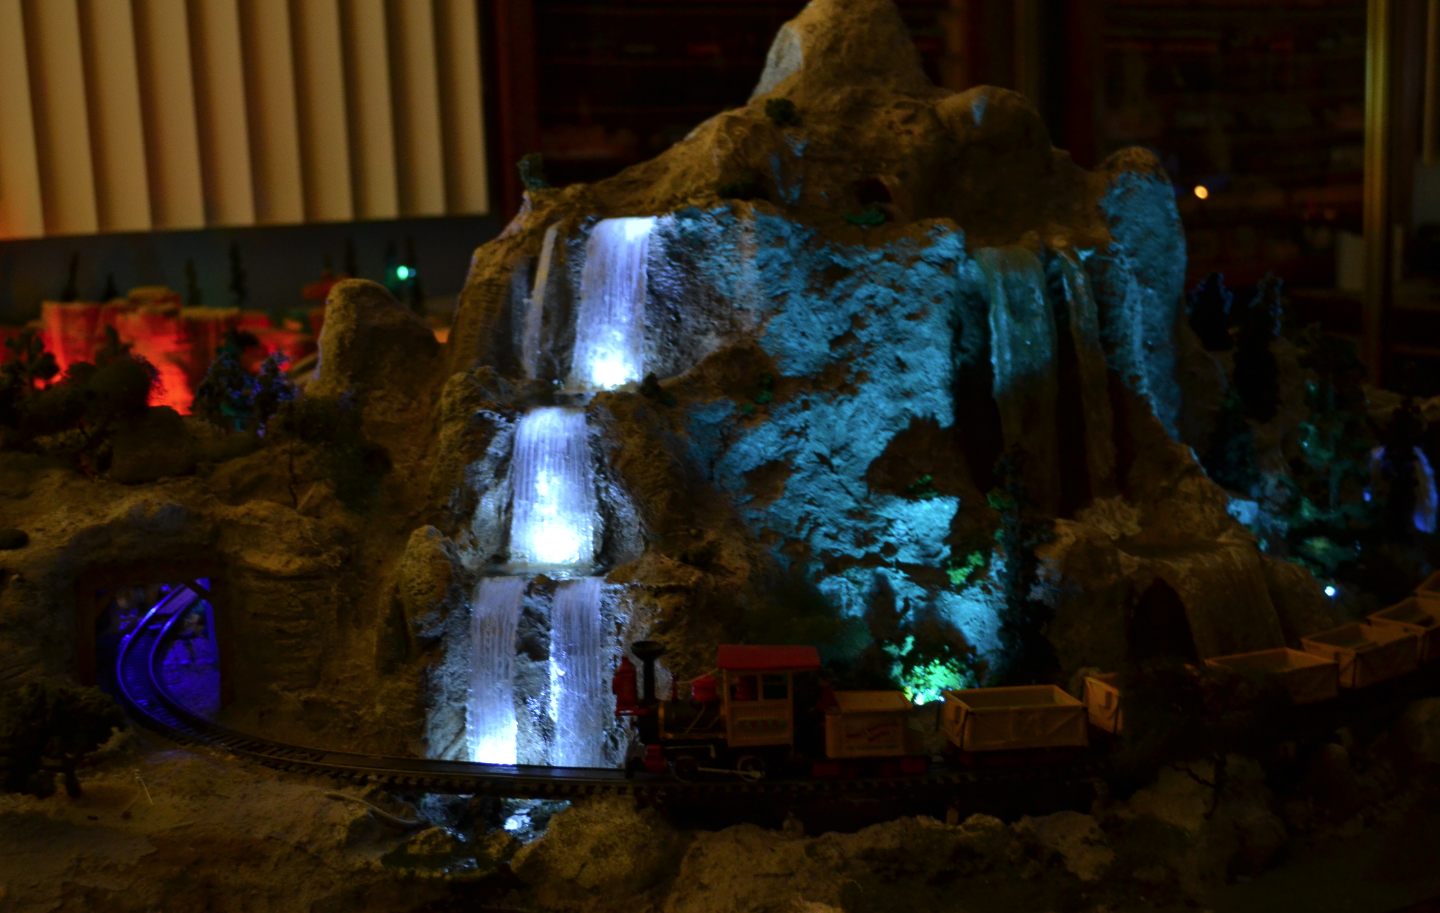
Not only do they look great during the day, they look even more spectacular at night! 

Even though Big Thunder falls haven't been updated yet, the lighting package had already begun installation. The greenish light at the top of Big Thunder Falls is the last incandescent light that was once the standard for the layout before LED's took over. 


August 2012 Update

Still got a bunch of things keeping me from working on the layout, but I still managed to get something done. As I slowly ease myself back into working on the layout, I started with something small before jumping into something more complex. This corner of the layout next to Cascade Peak has never been fully scenic-ed until now.


This work included finishing off the actual layout base corner properly and continuing the fascia until it reached the edge. 

Then it was matter of applying the various scenic materials to the hillside. 


It's not much, but that'll do for now!


By the way, I've created a BookFace page for the layout. Basically it's what's on the layout, but with more random photos and blurbs. If you're into that sort of thing. 


June/July 2012 Update: Water Special!

Waterways, finally poured!

June saw a major step forward in the layout progress: the waterways in Bear Country and Beaver Valley were filled with.... water!


Once all the details and figures were completed and installed, it was ready to pour the Enviro-tex resin. I tinted it a dark green color and did the first pour to get the waterways "level".

The Beaver dams just before the resin pour and figure installation.

Here's a look under natural lighting...


Beaver Valley getting it's water for the first time ever....  


Another layer of clear was poured to fill any nook or crannies that didn't get hit. While a perfectly glass-like surface looks great, it isn't quite realistic or not good at hiding dust. To create waves, I dabbed Modge Podge--a gloss medium-- all over the surface. This also conceals any issues with the paint or scenery below the surface that could be visible. 


A long-lens look at the creek between the two areas: 


Here's the finished Beaver Valley, captured with a wide angle lens:


Waterfalls: Cascade Peak Rehab part 2

Over two years ago, I finished a complete rebuild/upgrade of the Cascade Peak structure. The crowning achievement of that project was the waterfalls. They looked spectacular when first installed and really added a sense of realism to the layout. 


Fast-forward to today. Unfortunately, time and UV lighting have taken their toll on the once glistening waterfalls...


Now, it's one thing to have water with a slight color tinge, but to have it turn COMPLETELY yellow to the point it looks like sewage is not right! While the silicone caulking I used looked great first installed, demonstrated here, it's not the right choice long term. 

Looking for a replacement, I looked over the materials I used on similar projects. If I were going to redo the falls, I had to use materials that didn't fade or yellow. The silicone Caulking is out of the question. Modge Podge was used on the Rivers of America section at one point, but that turned yellow too. Perhaps thick quantities is the culprit. As with any waterfall technique, I started with a piece of clear plastic or polyester sheet. Rather than adding to it with caulking or mod podge, I decided to shape the plastic instead, since I knew the plastic itself wouldn't yellow (I've used this stuff for years; some examples I used in the past still haven't been affected). 

As a test, I dragged my soldering iron across the plastic strip in vertical streaks. I later formed the curve in it with a heat gun. Even as is, it looked great! I added shavings from grinded/drilled out casting resin to simulate the water breaking up at the bottom. I locked the bits in with a coat of Modge Podge (only lightly so if it did yellow it wouldn't be noticeable). As in the last set of waterfalls, I added faux spiderweb to create the mist. A little white paint on the top edge added a little punch in highlights.

Here's the test waterfall and the original waterfall it's replacing (the one on the left was actually the demo waterfall in my YouTube instruction video). You can tell how much the silicone caulking yellowed!


After the test waterfall, here's the rest of Twin Sister falls put in. 


Wow! Even better than before! Not only will these not fade or yellow (at least for the next decade) they are more accurate in scale, proportion and form.

While the falls look great as is, I had to plus-it. As with the rest of the layout, I decided to add LED's for nighttime layout running, not just to Cascade Peak (which has never had lights up to this point) but also the waterfalls too. Inspired by the Matterhorn's latest rehab with it's new cool-white lit waterfalls, I decided to do the same. 


There's one LED under each fall. Of course, that led to some scenery destruction to run wiring, but it was worth it. Here's Cascade Peak with it's flood lights underneath. The rest of the waterfalls are next for this major upgrade!


Onces the LED's were in position, I poured the pools for each waterfall with enviro-tex. 


A neat thing about these waterfalls is that the way the streaks were formed, the melted plastic literally makes them shimmer and shine in the light! 


At some point I'll have a new tutorial to show this technique. 

Watercraft: Adding Another Attraction

When Bear Country and Beaver Valley were finally tackled with their waterways, I knew the next section to get poured with resin would be the Rivers of America side of Cascade Peak. The main issue is the large spanse of resin that has to be poured in front of Big Thunder falls. Of course, to break-up the space, you need to add something.... 


A Keelboat!


Currently, a 1:48 version of the Gullywhumper is being made, so far only the hull has been fabricated. This will be the third attraction to be featured on the layout; something I didn't anticipate 7 years ago!


"Sorry for the hold-up folks...."

Although an update for June (and July) are due, I've got too much on my plate to do one at the moment. Sit tight, there will be one in two weeks!

May 2012 Update

I don't have anything new to update on for this month, unfortunately, been busy with other things. However, I do  have a new photo for this month; a shot of the layout, one "foggy" morning...


April 2012 Update


Slowly but surely, Bear Country is slowly coming together--and populated. I finally painted up the bears that were cast months ago and they are in place in the pond, awaiting the water to be poured from enviro-tex resin. 


Meanwhile, on the other side of the "forest" section, Beaver Valley took another step in progress. The dams were made from backyard twigs and sticks and the building animal itself was painstakingly sculpted. 


At this time, miniature counterparts of birch trees were "planted" which helps define the Beaver Valley section.


I sculpted two versions of the beaver, one in the standing position as shown above, and another in the swimming position, which will soon be embedded in the enviro-tex water. 

Since I needed multiple beavers, rather than just the two that I sculpted, I molded the two sculptures in silicone rubber for casting. Until I could get around to that, I decided to change gears and focus on a section of the layout that has been needing some work for quite some time: Rainbow Ridge. 

To really get started on Rainbow Ridge, and to get every detail right, planning and drawings need to be done. 

When I mean detail, I really mean it; every lantern, every railing, every exit ramp, are all being meticulously accounted for in the planning stages so construction can go smoothly and I won't have any "Oh, I should have added that earlier" situations. I started the main block of Rainbow Ridge elevation drawings, and recently I've done the Mineral Hall complex and the massive plan-view drawing that brings everything together. 


Of course, I can only get as accurate as I can with the space given. For example, on the real attraction, the Opera House is aligned with the curvature of the track, so that it faces the loading area. Well, my track is a little more straight, so it faces away from it slightly. The load area was also downsized in one area so it would actually fit on the layout.  Little things like that will have to be compromised later, but you get the idea. 


There are still plenty more drawings to do, especially in the Pack Mule load area. Once those are done and the mock-ups are satisfactory and everything about right, construction can finally begin!