"Howdy Folks! Welcome to the little mining town of Rainbow Ridge, the gateway to Nature's Wonderland"

This is my documentation of my miniature re-creation of the long-gone Disneyland attraction: Mine Train Thru Nature's Wonderland. This is a selectively compressed model railroad, in On30 scale at 5' X 7.5' that has been in progress since September 2005. In May of 2016, I finally got the layout to a point where I declared it "finished".

I started the layout when I was a sophomore in high school with basic skills and over the years the layout has been improved and reworked in drastic ways to match my ever improving model making skills. In fact, since I started rebuilding the sections to better quality and standards, I've actually created a whole new layout, piece by piece.

This is a stand-by basis project without a deadline, so it tends to hit the back-burner a lot due to other things with higher priorities. But whenever I can, I'll give an update when there is something worth talking about. All of my updates since day one are here, which include photos, videos, and plenty of rambling notes and descriptions.


April 2011 Update

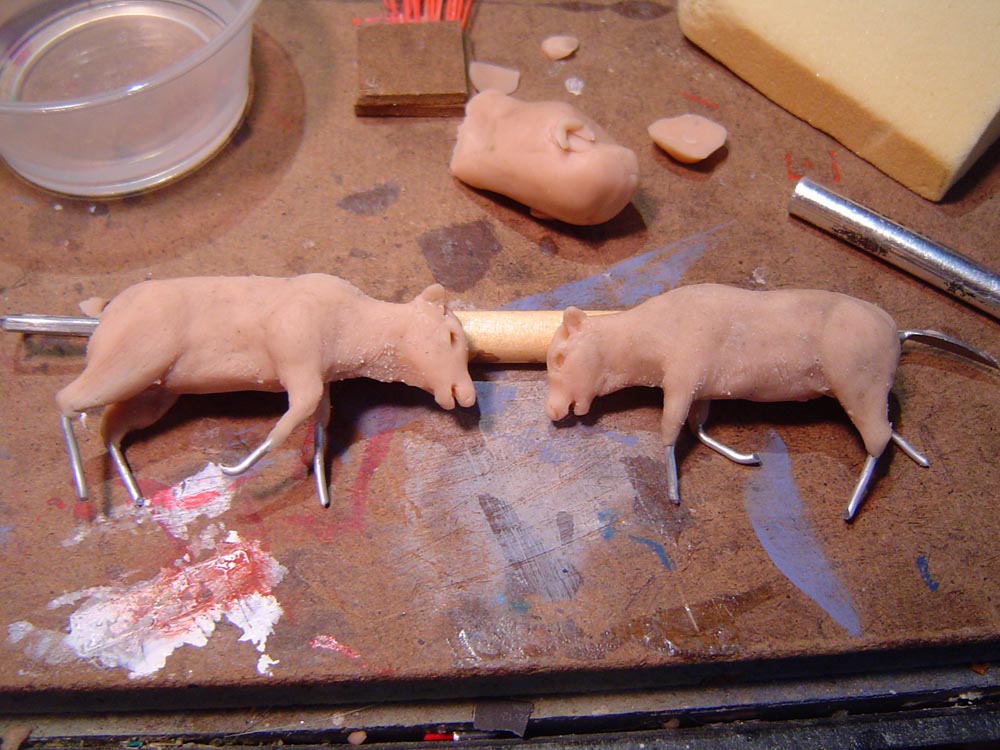
The Battling Elk sculpts have finally been redone and finished; now it's a matter of getting them installed on their mechanism, painted, and area scenic detailing.


The left shot shows the scale difference between my original figures and the new figures. The right shot gives a sense of scale of the new figures. 

Here's a video that shows the general movement of the elk on their mechanisms. While I would have liked to have their legs move like in the original ride, they were just too delicate and small to mechanize. 


Next month's update will show the actual mechanism itself, plus the finished scene. 

Virtual Wonderland

On a Nature's Wonderland related note, I've slowly been working on a CG version of the Mine Train. Since the world is leaning towards doing everything in the computer and less physical models, I'm having to teach myself how to compete in the ever-evolving world of movie studios, architectural and design firms, and even Imagineering. So, as a little project in addition to other modeling for school projects, I decided to bring my favorite attraction into the 3D medium. I won't be recreating the entire attraction (yet....) since I'm just learning and working on small scale things (I don't want to take a bite out I can't chew ).

Here's a little sample of where just the locomotive it at.


And here is a little bit of the work flow, which shows the sand pipe being modeling in Maya.


In other NWRR "News"

Normally the layout is only known to the public through this blog. I've checked the stats and the views have risen slowly over time and it's relayed through-out cyber space. But within the last month, it really went "public".

I got an email from a guy named Mark Eades, who was a reporter for the OC Register (and a former Disneyland CM and Imagineer). Being how great the register has been with covering what's going down at Disneyland and reflecting back on it's history, I was intrgued. He said he was doing a story on the old Mine Train ride and he had noticed my blog. He thought it would make a great story for the Register and he asked if he could do an interview. Being that the register was an "official" establishment and not some freaky fan-run unofficial website, I naturally said yes.

Although there wasn't much to show, since only half of the layout was finished, the layout did get cleaned up and the finished areas given a touch-up. Everything went smoothly during the video and photo sessions. It was really odd being in front of the camera, since I'm so use to being behind the camera and doing everything myself. It was interesting to see how they documented it from their perspective.


http://ocresort.ocregister.com/2011/04/01/long-shuttered-disneyland-railroad-lives-on-in-miniature/73977/

(Didn't realize how flat and monotone my voice was ( I really don't think I sound like that!))

The day after the article was posted, I went downstairs to the dispatch office at work, and there it was, all printed up and pinned on the bulletin board-- the article. Honestly, I didn't know how to feel; I liked the fact that it was noticed (probably by one of the managers), but at the same time, having the entire Disneyland Custodial Department (and probably the rest of the park) know about my unusual hobby of building a dead theme park ride did make me feel a little awkward. Something like this is something I would just keep to myself since I don't like to toot my own horn too much; especially at work where you have a few people that could care less about the park's history and would see people that knew too much about the place as "obsessed".

However, my coworkers that saw it and said something to me about it were all appreciative of the work I did and were very impressed. The newspaper version was later printed and it got more praise and exposure.  In the end, after cringing a bit over all my coworkers knowing about I what I do when not at "The Park", it was a good move and looks really good on a resumé.

And now everyone knows why I take a lot of time when working around Big Thunder!

March 2011 Update


Before I could really get any work done-- or really preliminary work-- on Rainbow Ridge, I had to get the turnout motors installed. (By the way, the photo at left has no relation to the topic of turnouts; I just thought it looked nice). Originally I was going to have ground-throws, but I thought it would be easier and more fun to actually have them move automatically without fingers interfering with the scene. The most popular turnout motors out there for model railroads are the Tortoise switch machines; I was planning on using two of these to control the turnouts that would diverge the trains onto the main line or the spur line. The problem with  the Tortoise machines was finding a way to adapt them to my layout (since I can't mount them underneath as they are intended). After reading an article of Model Railroader, I found a much easier and cheaper alternative: servo motors. Intrigued by how they were used, I ordered two Hitect HS-311 servos for about $7 a pop (which is a great deal considering Tortoise Machines go for about $20 each directly from Circuitron). 

Because of their small size, I was able to  mount each servo next to their respective turnout. Considering the strength the servos have under power, I included a pair of micro-switches that will cut power to the motor when the switch points make a full movement. This way, when the switch points complete their move, the motor isn't still on and stalling itself out. To make life simpler, both servos are connected to a single DPDT switch which will align both turnouts to either the Main or spur. 

Here's the servos mounted next to the turnouts. Each one got it's own unique set-up, due to the position of
the actuating rod for the switch points. The servo on the left next to the Rainbow Caverns 
tunnel will be hidden by Mineral Hall and the servo on the right will be hidden by the Opera House.

Here's a quick video showing the servos in operation. The great thing about the servos is that they're very efficient; I can run both of them off a single AA battery. (To create a slower motion, I could even drop the voltage further). 


Back to the Battling Elk

After wasting my time making the first figures the wrong size, I finally got myself to at least start the revised elk figures. These ones are going to match the same general scale/size as the Woodland Scenics deer so they won't look out of place next to them in the finished scene. While I would have liked to get the both done installed by the end of this month, it's a start. As you can see, the new more in scale sculpts are about a 1/3 smaller than the originals.  

If I go any smaller, I think I'll go blind.
Relay Delay

I hit another snag in my block system; I need to separate the relays that control the signals and the relays that control the block cut segments. Since I want to be able to disable the block relays and still have the signals work if I was testing a train or just running one train (which results in having two relays for each block, one for the cut segment and one for the signals) I was originally going to have the power cut from the block relays to disable that feature while the signal relays still worked. Well as it turns out, from testing it didn't matter if power was cut (aka the common wire); the relay with no power still worked! It was getting power from the other relay it was connected to.  So as a result, I need to add 3PDT switches between the two relays for each block. This was power for the block cut segments will be completely turned off without anything weird going on. (Did that make any sense?). 

February 2011 Update: Bits and Pieces.

There wasn't really a focus for the layout this month, it was a lot of, well, bits and pieces.

Battling Elk

After slowly developing Bear Country over the last few months, I found the next big thing to develop and install was the Battling Elk. After working with the Marmot tunnel, it was easier to work on the surrounding features when the piece was put in, rather than finishing off everything and having to rip it all out later if changes need to be made. As with the Elk, I needed to sculpt the fighting duo and put them on a mechanism and then drop the whole unit in. In order to determine the movement and size of the mechanics that will move the Elk back and forth, I needed the Elk themselves.

I set to work with a handful of Super Sculpey and some reference pictures and measurements of real Olympic Elk. After many hours, one was produced and few more hours later, a second. I'm very pleased with the results. When I originally took on the project almost 6 years ago, I wasn't really a good sculptor at all, especially small animals-- which really doesn't make Nature's Wonderland a good project for a 14 year old, especially when the attraction originally boasted having "over 200 lifelike animals". Over time, I realized this WAS the perfect project for me to do, since it forced me to practice and get better at sculpting, and that's shown in this latest example.


When the sculpts were done, baked and ready for the next step, I mocked up the area where they would be placed in order to get an idea of the space I have for the mechanics. Unfortunately, since this is a selectively compressed layout, it's really cramped in Bear Country and Beaver Valley. A piece of plastic represents the size of figures and their orientation. In order to give the terrain a natural look, I had to figure out how much area the hills sloping up to the Elk (they were on a hill on original attraction) and mechanism would eat up. So, as a result, a bunch of markings were made in the Beaver river for potential shifts in the river.

Planning out the Battling Elk. Markings are made for potential shifts
in the Beaver River.
Concerned with how much space the hill leading up to Elk was taking up I came to a sickening realization: I think I made the figures too big.

The original plastic moose that have
been standing in as my Battling Elk
for the last few years
The space for the Battling Elk was originally designed around the size of two plastic moose I had standing in for the Elk for some time now. After some measurements and guesses, I figured the Elk sculpts would be just a little bigger than the moose. As it turned out, a little bigger turned out to be too big. I didn't take into account that the Elk in the ride might have had a little forced perspective and they did look smaller once I looked at some photos of them on the hill on the ride a second time. There was a full-size fiberglas Elk, coincidently, sitting on a pallet backstage behind the Haunted Mansion; I was able to make mental notes and measurements with my arms and it was indeed smaller than what my sculptures represented. The final confirmation that I screwed up the sculpts was when I ordered some Woodland Scenics deer to accompany the fighting elk that would stand in as the cow elk. Sure enough, my figures were way out of scale, almost twice the size as the Woodland Scenics figures (which are O scale).

So the elk figures I made are put aside, awaiting their smaller cousins to be made and implemented. At that point, I decided to change gears.

Wires, relays, reed switches, and more wires.

Since the layout was still in a developing stage, now is the time to do some crazy wiring considering it's going to be a lot harder to do later on a finished layout. When it comes to crazy wiring, I'm talking about the block system and "auto-stop" system I'm putting in.

The layout is divided into four blocks. Each block will be wired so at the flip of toggle switch, the block can be controlled by one of two power packs, thus a two train operation.

The four blocks on the layout
 In addition to that, the last foot or so of each block will be isolated, which will be turned on or off, depending if a train is in the next block. For example: As one train enters a block, a reed switch triggers a relay that turns the last 12" of the previous block off, forcing the train behind that's about to enter occupied block to stop. Once the train ahead moves into the next block triggering another reed switch flipping the relay again, the previous block will clear and the train stuck in the powerless section of track resumes it's journey once power has been restored. Every block will be this way, so that even if the trains are going on their own without any human control, they won't run into each other.

. So, if a train were to enter a block, the block if just left would shut off the last foot, preventing a train behind to enter the already occupied block. The turned off block would be cleared and turned back on once the train enters the next block. This is all being done by reed switches and latching relays for simplicity. I tested this new system with two blocks and the results were really satisfying.

This is what brings the two layout sections together electrically: 15 pin connectors.
15 pins may be a bit much, but it'll allow easy expansion for sound, lighting, animation, etc. 
The "spine" or the main electrical chase along the backside of the Living Desert
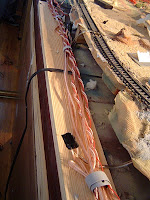
Before I can rig up the system, I had run wiring for every block and isolated block segments, as well as wiring for the reed switches and the signal lights (each block will have a red/green dwarf signal light, for ease of operation and aesthetics). Since the layout is now portable, I didn't want to run a whole bunch of wires down to the control panel (which will plug-in to the layout) and have to have appropriate connectors for the number of wires. The easiest solution was to have the all the relays, and most of the reed switches on the large half (Living Desert) of the layout. That way there's less wires to jump through connector plugs. Originally, all the relays and wiring would lead to the bottom right corner of the layout, basically behind Casa de Fritos. Then I decided to change the location to just behind the Geysers and adjacent to the Caverns because it was more convenient and more space (it would take research described later in the post to figure out if there was room). All the wires run up the "spine" of the layout, which is channeled through a pipe under the Living Desert and under the Natural Arch, and then runs across the backside of the layout, about where the SF & DLRR goes (or was going to go, since that space got cut short after the layout got retrofitted). To keep things clean, all wires are screwed to a 20 place terminal block.

"Relay Central". This is where all the relays, signals, and reed switches will connnect
in a clean and organized fashion. The Caverns and Geysers are just out of frame above.
Once everything was screwed together and organized, I began to wire the latching relays together. Each block had a reed switch, and that reed switch would turn on a relay or turn off a relay (which would turn a block on or off). Basically each reed switch was wired to more than one relay. Everything was going smoothly, but once I added a second relay, things got screwy. When testing with a train, some reed switches were turning off blocks/relays that they weren't even wired to! After many hours of frustration and head scratching, I figured out the hard way that I can't have multiple relays share the same reed switch; the coils in the relays themselves were acting as jumper wires for other relays, and thats what was messing everything up. I came to the conclusion that I would have to rig another set of reed switches-- doubling the number from four to eight-- in order to work around this problem. Basically, each relay would have it's own set of reed switches-- one to turn it off, one to turn it on. It means more wires, but it means no shared reed switches with no problems.

Growin' Some Trees

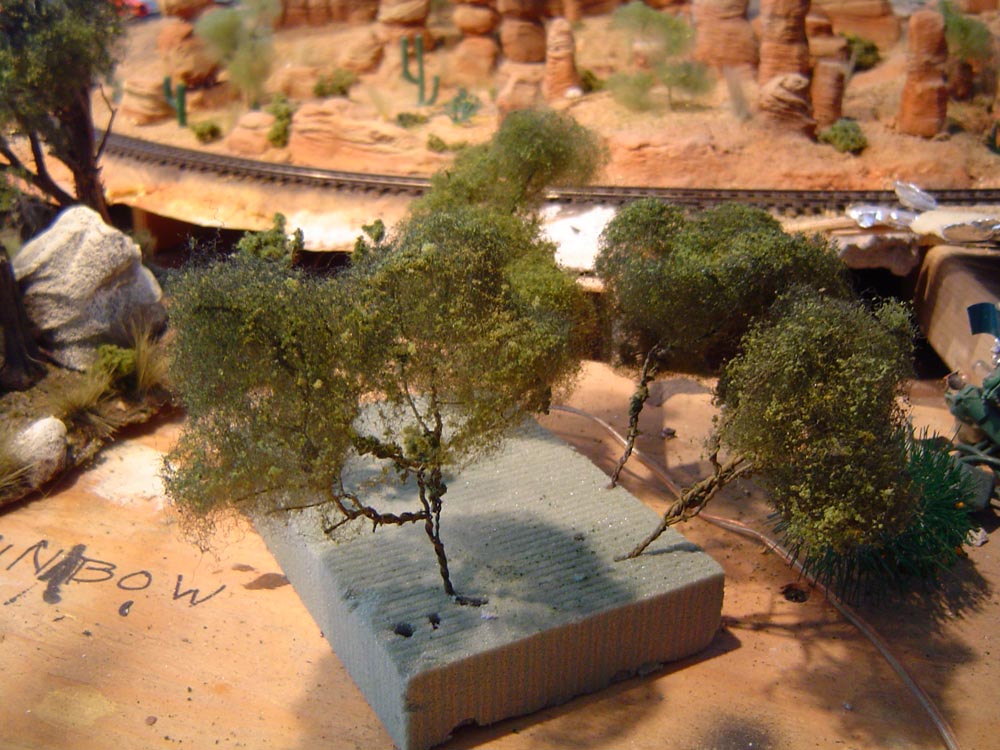
After an article Model Railroader, I started experimenting with making trees out of wire branches, fiber foliage and ground foam. They aren't ready to be "planted" yet, but here they are:


When I get into full tree making production I might do a time lapse/tutorial.


Casa de Fritos PART 1: What's Left?

As mentioned earlier, when I was originally considering putting the relays and terminal block pictured above behind Casa de Fritos on the corner of the layout, I wasn't really sure how much space I'd have. I had never really looked into what made up Casa de Fritos building-wise, which needed to be determined if I was going to hide wires and relays.

An aerial shot showing Rainbow Ridge and Casa de Fritos highlighted in yellow
Casa de Fritos is highlighted in yellow in this aerial above. To keep things simple, I've included Mineral Hall in the complex. Everything above the red line will be built on the model, everything below, I'll just say "I wish". Unfamiliar with what it looked like, I turned to Davelandweb and his excellent source of vintage photos.

Photo Credit for these three photos: Davelandweb

I was also able to stitch together this panorama, from two photos from matterhorn1959.blogspot.com

Photo Credit for the two photos stitched together: matterhonr1959.blogspot.com
All of these photos gave me a good idea of what the area looked like, and once I cross referenced a few things, I became familiar with how everything is laid out. Unfortunately, due to the space constraints on the layout, I can't build the main entrance and patio area as shown in the top photo. Luckily, by shear coincidence when I was planning Rainbow Ridge, the pillar with a bit of blue on it in the middle photos  will just make on the layout, which will help establish Casa de Fritos on the layout since the name is on it.

I knew most of Nature's Wonderland had been destroyed when Big Thunder came to town, but what about Casa de Fritos? That was something I had find out. Once Casa de Fritos dropped their sponsor, the restaurant became Casa Mexicana  and it remained pretty much the same. Then in the mid-90's, the area went under a major renovation and became Rancho del Zocalo. With the large patio right next to Big Thunder out front, it was really hard to tell if any of the Casa de Fritos facades still existed.

Color elevation for Rancho Del Zocalo, which was the first tip that Casa de Fritos might still exist in some form
The first clue that the buildings/facades are still intact was this color elevation from "The Art of Disneyland" for the Rancho renovation. Everything appeared the same after cross referencing. Since this was just a color elevation and many more could have been done, I was unsure of the accuracy of it. Plans do change, especially when it comes to design theme parks, right down to the color scheme.

I had to get a closer look to see what's left and there was only one way to find out: FIELD TRIP!

Casa de Fritos PART 2: A Research Expedition.

When I had the chance, I made a trek down to the park on a mission to find ANY part of the facades left. I knew the Mineral Hall portion still existed and part of the restaurant entrance next to the Shooting gallery was still there, but everything else like the adobe hacienda style buildings I was unsure about.

(Above) Rancho del Zocalo entrance
(Below) Casa de Fritos entrance
Still the same!

Here's the Entrance, now and before, top and bottom respectively. Once your eye gets past the ironwork and overgrown greenery, you can see that even the "bricks" showing through the the surface of the structure survived the renovation. (I really wanted to match the angle perfectly, but planters, railings and other diners prevented me from doing so).

What's all that in the back? Could it be?
Venturing deeper, I see Mineral Hall is still there as it was more than 50 years ago. There's no blacklight rocks, but it's now the departure point for diners after they pay for their meal and exit onto the patio. 

Mineral Hall, still here as well!

Panning over to the right, I was surprised by what I saw: EVERYTHING is still here! 


Above now, before below


There is one major difference though: The facade of the Assay Office has been stretched vertically to meet the height of Mineral Hall, most likely to hide the edge of the facility building. A few doors and windows on the lower floor might have moved around, but other than that, everything is pretty much the same. 


These two shots I tried to match the angle, despite all the clutter and tables around. Even the detail above the doorway still exists. And that pillar with a little blue paint on it that says "Casa de Fritos"? That's still here as well!

The hidden pillar that once had "Casa de Fritos" painted on it.

So now, knowing that most of the former Casa de Fritos is still around, if I need some reference of measurements, I know exactly where to go! 

I never did find that Frito Kid though.....
A Little Photoshop

Did some screwin' around in Photoshop the other day, giving it a slight retro postcard look.


Next Month:

In the month of March I want to get my block system all ship-shape and operational. Hopefully the new Battling Elk sculpts will go well and will finally get mechanized. I'm also getting ready to motorize the turnouts in Rainbow Ridge and Beaver Valley might get more developed. 


January 2011 Update: Back to Work


With the new year two weeks in already, the layout took more form and is rapidly gaining speed whenever I can squeeze in an hour or two to fiddle with it. The new focus now is to get Bear Country and Beaver Valley areas pretty much finished, with some exceptions like trees and other small animal details that can wait to be added later. I'm getting closer to the point where most of the major hill blocking in is finished and the finer details can be made.

Aerial Shots
I added a new section to the blog: Aerial Model shots. Basically overhead shots of the whole layout through various stages of construction. Unfortunately, there's a five year gap between the last two pictures, but hey, it's all I have. Also included on the same page is a brand new shot, which shows a lot more greenery than the last few shots.

Quite a difference between these two shots, especially Cascade Peak.


"Them little marmots over the tunnel must be a whistlin' to all you pretty gals, can't say I blame 'em".


The tunnel with the marmots popping up top (known as the "Marmot tunnel" in my writing) was officially finished and installed, which included putting in all 5 mechanical 1/2" tall marmot figures on the rig, each with their own unique movement. Something like this can only be demonstrated through video:

This is also the first video to ever use a new technique to me--green screen. I was able to shoot the footage against green screen and composite a sky in, so the viewer wouldn't see any unsightly views like paint jars and window blinds. I even got the clouds in the sky to move slightly.

New hill, more trail; along the future the Rivers of America
After completing the tunnel, I proceeded to continue the pack mule trail over the tunnel. I did a small sample several months ago, and I followed the same scenery techniques to cover an new section of hillside. I didn't go too far, as I did before, so I wouldn't have to tear up to much when I figure out and develop the Rainbow Ridge area.

Beaver Valley Scenery
The section of rockwork and the adjacent scenery started to take form along the track in Beaver Valley. The last time the area was "finished" was back in June 2006. I've come a long way in "scenic-ing" in the last almost 5 years. It's kinda hard to believe that everything in the second shot is new material; nothing from the previous shot transcended into the current day.

Above, Old Beaver Valley, June 2006
Below, New Beaver Valley, today.

The hills behind the stretch of track for Beaver Valley were pretty much done for the umpteenth time, hopefully this is the last time. The gray celluclay in the foreground will be the future river with the dams. Since the layout can break into two segments now, the split line is visible.

Hillside scenery and rockwork for Beaver Valley. The river will appear in the foreground eventually.


Bear Country


Not much yet has happened in Bear Country yet since Beaver Valley has been the focus of attention. On the To-Do list is to construct the truss-work for the trestle, sculpt another bear in the water (ones on land can be pushed back until later), greenery and eventually, the Enviro-tech water.

Half Bears for the water
Here's an overview of the whole area, which looks a lot better than this shot posted months ago.


I threw down some pigment (some random green color I had) to give the viewer (and myself) a sense of what's going on in terms of waterways and land forms. 

To recap, here's the same photo from the top of this post, this time labeled to show what's new and different since the last photo. 


"Finishing Date"
I've pushed back the "finishing date" for the layout; at the top of the blog, I've written that "I might finish the layout by late 2010/ early 2011. Well, things have changed and I didn't come as far as I thought when I wrote that and it's now late 2011/early 2012. Plus, at that time, I wasn't devoting almost 30 hours a week at a job. 

December 2010 Update: Still Nothin', but I got a little Somethin' going

The December update for this year will have as much a last month's update. But, since my Spruce Caboose building was finished, progress did pick up towards the end of the month. I finished off the marmots over the tunnel and that piece was installed. More hills were put in and the whole section of Beaver Valley and Bear Country is shaping up quite nicely since having to be recovered from having the whole layout cut in half. I'm looking forward to some fun stuff for this section coming up, but that'll have to wait until next year's update (Ha! Get it?).

I did some messing around in a composite program called Shake, learning how to do green screen stuff. I did a small clip of my layout, doing the typical sky replacement. I added some steam for fun from Particle Illusion.


November Update: I Got Nothin'

Layout progress was nonexistent in the last month, been too busy with other things and other side projects. So much that I updated the sidebar as "project on hold". Fingers crossed work will resume again later in December.

--------

Although not related, this was one of my side projects during the winter. Every year in December, we set up a small Department 56-esque village that has the usual 2-3 buildings. When the thought of adding a new building came up, I thought it would be more fun to BUILD one, rather than BUY one. Thus, the creation of the "Spruce Caboose Hobby & Craft" shop. I designed this building completely from the ground up, drawing architectural details and color scheme ideas from Disneyland's Main Street, in order to compliment the most outstanding building we have currently, the "Sweet Shop" candy shop.

Colorized front elevation drawing

When completed, the building will have miniature working model layouts in the display windows, with a fully detailed interior. 

The real deal, built completely from scratch out of styrene.
The "Sweet Shop" is coincidentally in the background.

More on this will be posted on my main blog when it's finished.

EDIT: Here's the link:


Spruce Caboose Hobby & Craft

October 2010 Update: Natural Arch Special

Things have really slowed down on the layout in recent weeks, school and work really like to take my time this time of the year. I did get some work done on the Natural arch bridge though. For the fifth and FINAL time, I've redone the bridge to the proper specs and details and it looks better than ever. The previous version had to be adjusted so many times that it just couldn't survive being that it was a just a shell of celluclay. This time around, I decided to make it out of floral foam for a rigid and solid piece, but also to show how well this stuff works for how cheap it is ( 6 bricks of floral foam for $3; pretty good bargain!).

In my usual fashion, this rebuild was documented in time-lapse.


Just for the heck of it, here's a history of all the Natural Arch Bridges through the years:

First Arch: September 2005; nothing fancy, just an arch out of paper mache


Second Arch, (sort of) June 2006: a modified version of the arch above, to accommodate the Pack mule trail (shown here painted in May 2007)


Third Arch: During the big Winter of '09 Desert redo, the arch above was torn out and a new arch was built (look at the bottom):


Fourth Arch, June 2009 :That arch only served as a placeholder for a few months until the previous version was made out of celluclay


Fifth Arch, October 2010: Hopefully the last natural arch I'll have to create. This time out of floral foam with accurate details, accurate paint scheme, and enough path envelope for the train. 


That's it for this month's update; very short, but that's all I got going on, unless the Park's busy season's calm down or the midterms die down-- both of which I doubt will happen with winter approaching. But, as I always say, we'll see.